Food and camping go together like peas and carrots. But not everyone is enthusiastic about creating great food at camp. This can be especially applicable to camp lunches. Often time is short in the middle of the day and quick easy food is needed. Or the meal needs to be portable to eat on the go when you’re out and about exploring.
That said, some folk spend all day at camp and have plenty of time on their hands for creating masterful meals that are fit for the whole camp.
Whether you’re in need of some quick and easy camping lunch ideas that you can whip up in a jiffy or if you’re up for cooking something more hearty over the campfire, our list of camp lunches should offer something for all.
- No-cook camping lunch ideas
- Vibrant Vegan Rice Paper Rolls
- Vegan “Tuna” Salad Sandwich made with Chickpeas
- Quinoa and Black Bean Mason Jar Salad
- 5 Bean Salad
- Curry Chicken Salad with Grapes and Celery
- Kale Salad with Almond Butter Dressing
- Cooked camping lunch ideas
- Vegan Cilantro Lime Tofu Tacos
- Vegan Brunch Bagel
- Aussie Damper Bread
- Dutch Oven Vegan Vegetable Stew
- Vietnamese Pancake or Stir Fry
- Fresh Vegetable & Quinoa Soup
No-cook camping lunch ideas

Vibrant Vegan Rice Paper Rolls
Recommended by: Nick Kembel – travel blogger and the adventurous mind behind Spiritual Travels
- www.nickkembel.com
- @spiritualtravels
- @nickkembeltravel
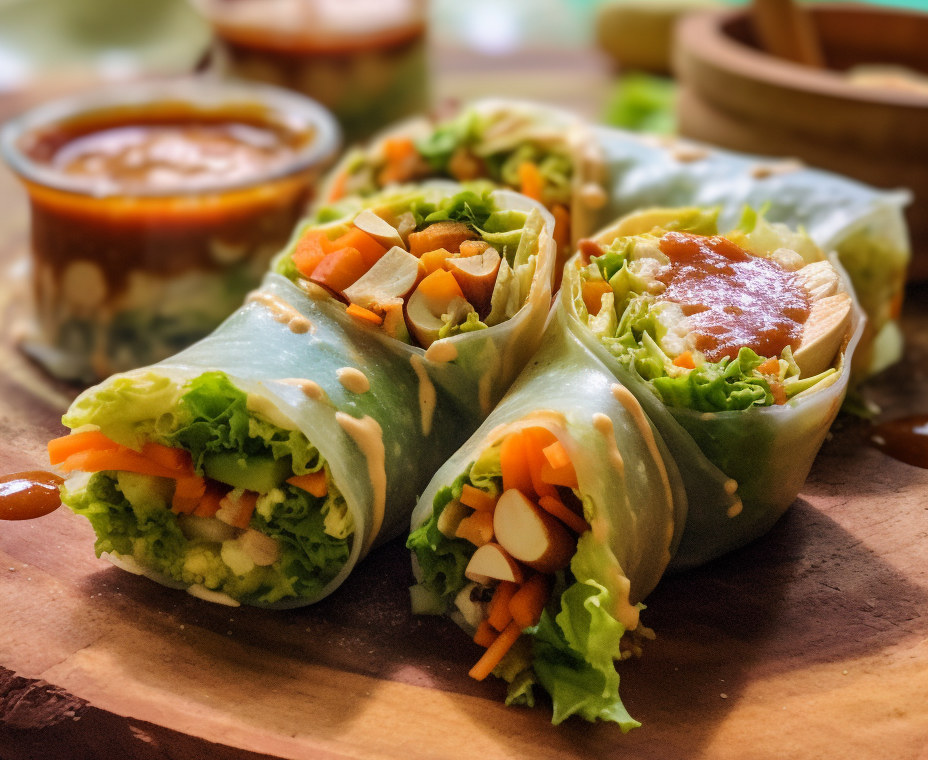
These Vibrant Vegan Rice Paper Rolls are an exquisite no-cook camping dish my family and I simply adore. This dish is like a mini Asian festival wrapped in a neat little package. The ingredients are resilient and packable, making them ideal for a camping environment. And don’t worry if you’re feeding a mixed crowd – these rolls are guaranteed crowd-pleasers!
Vibrant Vegan Rice Paper Rolls Recipe
Think about the dance of flavors that comes alive when you bite into a roll filled with crisp cucumbers, crunchy shredded carrots, slices of bell pepper, delicate sprigs of mint and cilantro, and a hearty serving of firm tofu. The accompanying peanut dipping sauce creates a savory and nutty edge, offering an unforgettable gastronomic experience.
Ingredients
- Rice Paper Sheets (quantity depends on the number of rolls desired)
- Assorted Vegetables (such as carrots, bell peppers, cucumber, lettuce, etc.) – quantity as per your preference, cut into thin strips
- Tofu – quantity as per your preference, cut into thin strips
For the peanut dipping sauce:
- 4 tbsp of peanut butter
- 2 tbsp of soy sauce
- 1 tbsp of maple syrup or agave
- 2 tbsp of lime juice
Method
- Start by preparing your vegetables and tofu. Slice them into thin strips for easier rolling.
- Soak a sheet of rice paper in water until it softens; this should only take a few seconds. Note that once rehydrated, rice paper can be consumed as is or fried, according to your preference.
- Once softened, lay the rice paper on a clean, flat surface. Arrange your chosen vegetables and tofu strips in the center of the rice paper sheet.
- Carefully fold the edges of the rice paper over the filling, and then securely roll it up.
- Repeat the above steps until you’ve created your desired number of rolls.
For the peanut dipping sauce:
- In a suitable container, combine the peanut butter, soy sauce, maple syrup (or agave), and lime juice.
- Blend the ingredients until a smooth consistency is achieved.
- Serve your visually stunning, vibrant vegetable and tofu rolls alongside the homemade peanut dipping sauce. The colors of your chosen vegetables will peek through the translucent rice paper, making the rolls as appealing to the eye as they are to the palate. Enjoy your meal!

Vegan “Tuna” Salad Sandwich made with Chickpeas
Recommended by: Gustavo De Obaldia – enthusiast of camping and plant-based cuisine
- www.ourplantbasedworld.com
- @ourplantbasedworld
- @OurPlantBasedWorld
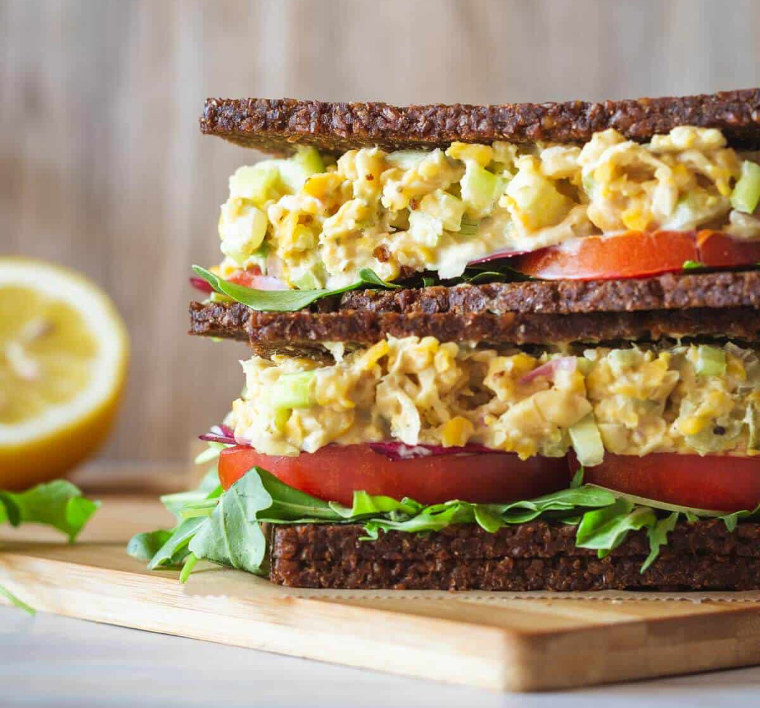
This versatile Vegan “Tuna” Salad made with Chickpeas can be enjoyed in a variety of ways to suit your preferences and circumstances. On its own, it’s a flavorful and nourishing dish that makes a great side or light meal. For a heartier option, spread it between slices of bread for a satisfying sandwich that’s perfect for on-the-go eating during camping trips.
Alternatively, combine it with cooked short pasta like elbow pasta for a delightful cold pasta salad. Each serving method transforms the salad into a different culinary experience, making it a versatile choice for diverse palates and dietary needs.
Vegan “Tuna” Salad Sandwich made with Chickpeas Recipe
Easy to prepare, nutritious, satisfying, and most importantly, perfectly suited for a camping environment.
Serves 2
Ingredients
- 1 ½ cup chickpeas from a 15 oz can 390 g drained
- 1 shallot finely chopped, or ¼ red onion
- 1 tbsp lemon juice
- 2 tbsp vegan mayonnaise
- 1 tbsp mustard
- 1 celery stalk finely chopped
- 1 tbsp capers finely chopped
- 1 tbsp apple cider vinegar
- Salt and pepper to taste
Method
- Begin by finely chopping the shallot, celery stalk, and capers.
- Then, combine all of the ingredients thoroughly in a mixing bowl.
- Finally, choose your preferred method of serving – either served on its own, as a sandwich filling, mixed with cooked elbow pasta for a pasta salad, or placed onto radicchio or romaine lettuce leaves for a bite-sized appetiser. Enjoy your meal!

Quinoa and Black Bean Mason Jar Salad
Recommended by: Casey Atwood – Dietitian Nutritionist and owner of nutrition and travel blog
- www.rdontheroad.org
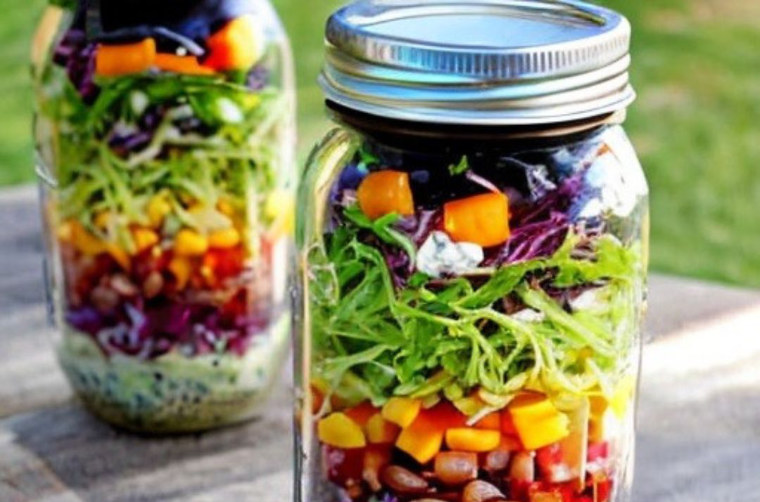
Mason Jar Salads are a great choice for camping because they are portable, convenient, and help keep ingredients fresh. The layered structure of mason jar salads keeps the dressing separate from the vegetables, preventing them from getting soggy. They are easy to prepare in advance and can be customised with a variety of ingredients to create nutritious and flavorful meals while enjoying the outdoors.
Quinoa and Black Bean Mason Jar Salad Recipe
This is the basic recipe, but feel free to get creative and add whatever seasonal veg, legumes or protein you’d like!
Serves 4
Ingredients
- 1 cups quinoa, dry
- 1 cucumber, chopped
- 2 carrots, peeled and shredded
- 1/2 pints cherry tomatoes, halved
- 1 cup black beans, canned, drained and rinsed
- 1/4 red onion, chopped
- 1/4 cups sunflower seeds, raw
- 6 cups romaine lettuce, chopped
- 4 mason jars, 24 ounces
For the dressing a quick olive oil and vinegar would be great, but if you have the time whip up this easy dressing:
- 1/3 cups olive oil
- 2 Tbsp red wine vinegar
- 1 Tbsp lemon juice
- 1/4 tsp garlic powder
- 1/4 tsp oregano, dried
- Salt and pepper, to taste
Method
- Prepare quinoa according to directions. Set aside to cool. This can be done at home before camping to make it a no-cook recipe.
- Prepare vegetables according to directions.
- Add equal amounts of dressing to the bottom of each jar.
- Start with layering the hearty vegetables and grain first: layer equal amounts of quinoa, cucumbers, carrots, tomatoes, beans, onion, and seeds into each jar.
- Top with as much lettuce as you can fit in the jar.
- Store salads with lids in the cooler for up to 4 days.

5 Bean Salad
Recommended by: Chelsea Plummer – recipe developer and food blogger
- www.maesmenu.com
- @maesmenu
This recipe is great for camping because it involves no cooking, uses many pantry staple items, and is filling! The ingredients also don’t need cooling before making and once it’s made it stores well in a cooler.
5 Bean Salad Recipe
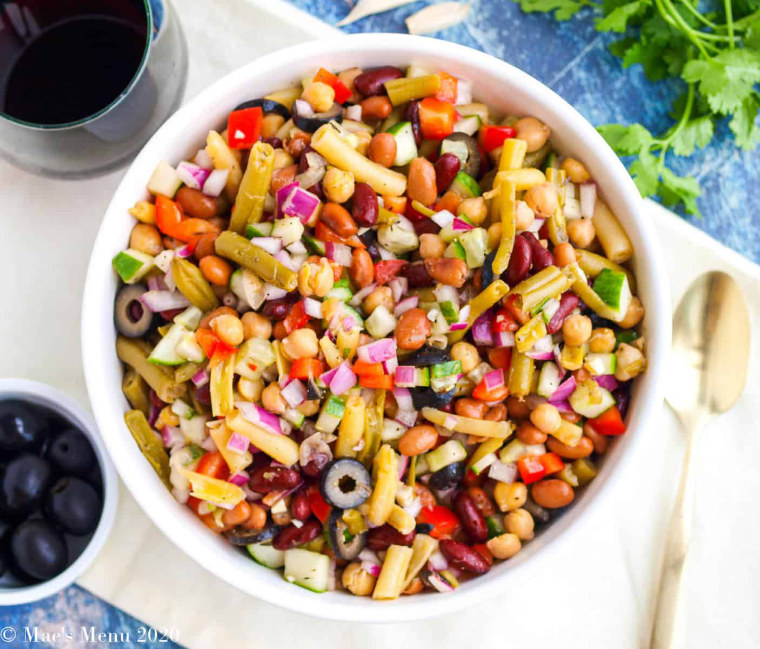
This 5 Bean Salad is crunchy, refreshing, and has a delightful sweet and sour dressing! It’s also brimming with plant-based protein.
Ingredients
- 1 x 15 oz. can pinto beans drained and rinsed
- 1 x 15 oz. can kidney beans drained and rinsed
- 1 x 15 oz. can garbanzo beans drained and rinsed
- 1 x 15 oz. can cut green beans drained
- 1 x 15 oz. can cut wax beans drained
- 1.5 cups diced cucumber
- 1 large sweet red orange, or yellow pepper, diced
- ¾ cup sliced black olives
- ½ large sweet white or red onion diced
Salad Dressing
- ½ cup red wine vinegar
- 3 Tbsp maple syrup or honey
- 2 Tsp dijon mustard
- ¾ Tsp salt
- 1 Tsp dried dill
- ½ Tsp dried thyme
- 2 small garlic cloves minced
- ¼ teaspoon freshly cracked pepper
- ¼ cup extra virgin olive oil
Method
- In a large mixing or serving bowl combine all the salad ingredients (the canned beans through the diced onion).
- In a medium-sized mixing bowl whisk together the vinegar, maple syrup or honey, mustard, salt, dill, thyme, garlic, and black pepper until combined. While still whisking, very slowly pour in the olive oil until all the olive oil is whisked in.
- Pour the dressing over the beans and vegetables and gently fold in until all the beans and vegetables are covered in the dressing.
- For best flavor, chill the salad for at least 1-2.5 hours (and up to 1 day) before serving, or serve immediately if needed.

Curry Chicken Salad with Grapes and Celery
Recommended by: Heather Englund – recipe developer and food blogger
- www.fitmamarealfood.com
- @fitmamarealfood
- @FitMamaRealFood
This recipe is great for camping because it uses minimal ingredients but packs in flavor. You can use pre-cooked chicken (store bought, or homemade), making it really easy to put together. Or use leftover chicken from last nights’ camping grill. It stores well in a cooler and tastes great as leftovers as well.
Curry Chicken Salad with Grapes and Celery Recipe
This easy curry chicken salad is nutritious, full of protein, vegetables and fruit, making it a stand alone lunch idea. It’s a fantastic use for prepped ahead shredded chicken breast, rotisserie chicken, or any leftover chicken you find you have on hand. Serve it tucked between 2 slices of bread, in lettuce wraps, or over a bed of greens.
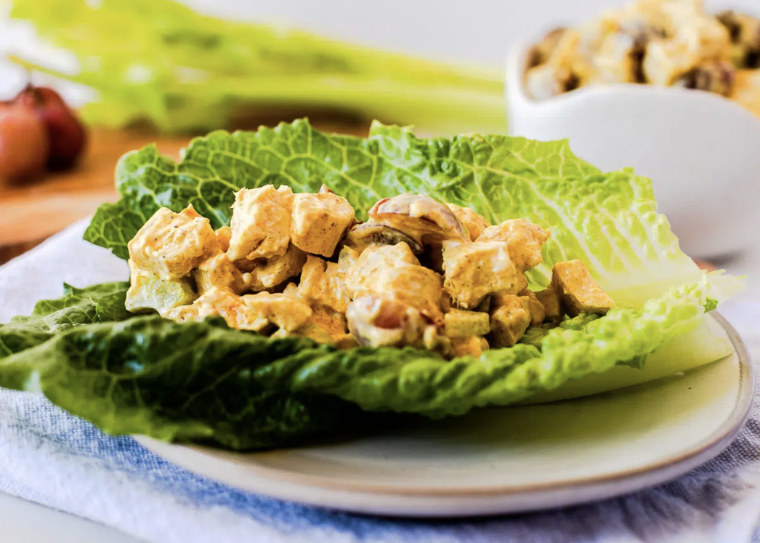
Ingredients
- 4 cups cooked chicken breast or rotisserie chicken, shredded or diced
- 1.5 cups celery, diced
- 1.5 cups grapes, halved
- ½ cup mayonnaise, (add more if you’d like it even creamier)
- 2 tsp curry powder
- 1 tsp sea salt
- ½ tsp pepper
Method
- In a large bowl add the chicken, grapes, and celery and mix together.
- Add the mayonnaise, curry powder, sea salt, and pepper. Stir until everything is combined and coated with the mayonnaise mixture.
- If time allows (but not necessary), let the chicken mixture chill covered in the cooler for at least 1 hour. This lets the delicious flavors develop and the liquids from the grapes release to add more moisture.

Kale Salad with Almond Butter Dressing
Recommended by: Amanda Johnson – Functional Nutritional Therapy Practitioner
- www.amandanjohnson.com
- @wildlyfed_fntp
Enjoy a quick and wildly nourishing salad to fuel your adventures, with sweet and tangy flavors of the almond butter and apple cider vinegar, helps draw out the bitter profile of the kale. Incredibly healthy, easy and delicious! Serve alongside your protein of choice, add quinoa, chickpeas or shredded chicken for a well-rounded high protein meal. Or enjoy by itself (which I oftenly do!).
Kale Salad with Almond Butter Dressing Recipe
I love to make this salad while camping as it holds up for many days (and actually seems to get better after a day or two!), it hits all the notes of crunchy, sweet and tangy!
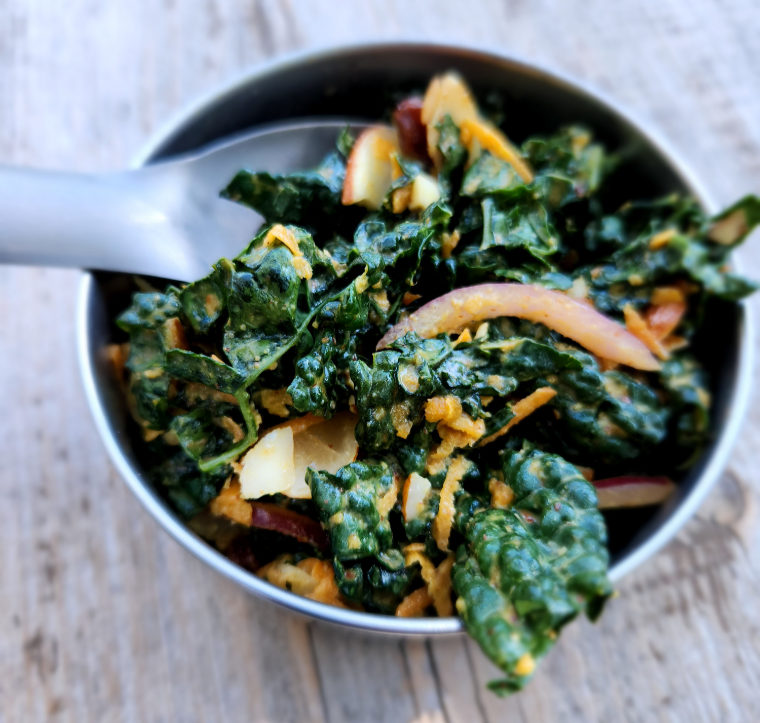
Ingredients
- 1 bunch of kale (washed, drained and patted dry), chopped into ribbons
- 1-2 carrots shredded
- 1/4 cup red onion sliced
- 1/4 cup slivered almonds
- 1/4 cup raisins
- Sliced red cabbage is also really delicious
Dressing:
- 2 Tbsp creamy almond butter (salted or non salted)
- 2 Tbsp raw apple cider vinegar
- 1 Tbsp real maple syrup
- 1 Tbsp extra virgin olive oil
Method
- Place all the salad ingredients into a salad bowl.
- Add all the dressing ingredients to a jar and shake well until combined.
- Drizzle the dressing on salad fixings and massage for 5 minutes.
- Let sit for a couple of hours or overnight.
Cooked camping lunch ideas

Vegan Cilantro Lime Tofu Tacos
Recommended by: Meredith Fontanta – naturalist, photographer, outdoor guide, and educator
- www.meredithfontana.com
As someone from Texas, tacos are my preferred choice of fuel while camping and adventuring. This is a fantastic dish for camping because it is easy to store and is extremely quick and easy to make. Only one ingredient (the tofu) needs to be stored in a cooler, which is very helpful when you have little cooler space. It’s a great option if you want an amazing meal but are too tired from adventuring to cook or short on time.
Vegan Cilantro Lime Tofu Tacos Recipe
This taco recipe is my favorite camping recipe because it is packed with plant based nutrients like protein and fiber, it’s easy to make, and delicious. This recipe can also be made without cooking if you don’t have a stove available.
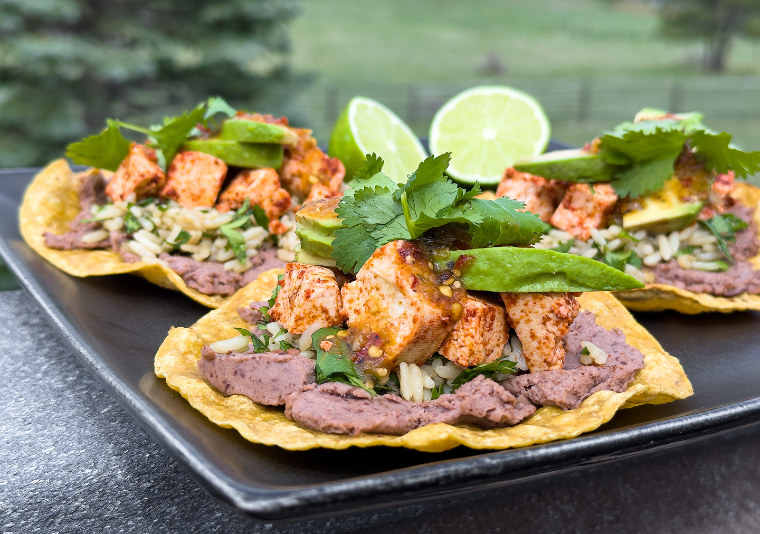
Makes 3 tacos (1 serving)
Ingredients
- 1 cup of firm tofu, cut into ½ inch cubes
- 3 corn tortillas (you can use hard shell tacos for an uncooked version.)
- ½ cup of precooked white or brown rice (I recommend the precooked rice you can buy in a pouch.)
- 1 can of refried black beans (don’t forget a can opener!)
- ¼ cup of chopped cilantro
- ½ lime
- ½ tbsp of extra virgin olive oil
- Olive oil or avocado oil spray
- 2 tsp of taco seasoning
- 3 tbsp of your favorite salsa
- ½ of an avocado
Method
- Lightly spray each tortilla with olive or avocado oil.
- Place each tortilla one at a time in a skillet over medium heat. Heat each tortilla until air bubbles start to form and the tortilla is slightly browned.
- After each tortilla is warmed, open the can of refried beans and use a knife to spread a thick layer of beans on each tortilla.
- Add the rice to the skillet and mix in the olive oil and chopped cilantro. Heat the rice for about 5 minutes. (Note: mix these ingredients together in a small bowl if you are not heating on a skillet.)
- Squeeze the lime into the rice and stir until the lime juice is mixed evenly.
- Add the rice/cilantro/lime juice mixture to each taco.
- In a small bowl, add the tofu cubes and mix in the taco seasoning. Stir until the seasoning is coated evenly.
- Add the seasoned tofu to the tacos.
- Top each taco with 2-3 avocado slices.
- Add a tbsp of salsa to each taco.
- Optional: squeeze extra lime juice over the tacos and garnish with extra cilantro.
Vegan Brunch Bagel
Recommended by: Carol – campervan owner and founder of Vegan Food Trainer
- @veganfoodtrainer
Campervan cooking is a challenge: Just the two rings and teeny, tiny pots and pans. Add to that preparing vegan meals and it can seem daunting.
It doesn’t have to be. Prepare ahead is the mantra of food training. I take all the spices and
ingredients I need and buy fresh ingredients locally.
We love trying new things and we’re always especially hungry mid-morning so these bagels were immense.
Vegan Brunch Bagel Recipe
Camping pans are often really tiny but this recipe works well as you can assemble one bagel at a time if need be. If you don’t have a fridge or cooler you could forgo the cheese, and the scramble could also be made with silken tofu and some kala namak and turmeric. Minimal prep and minimal equipment is required but the result is a protein rich, delicious and indulgent brunch.
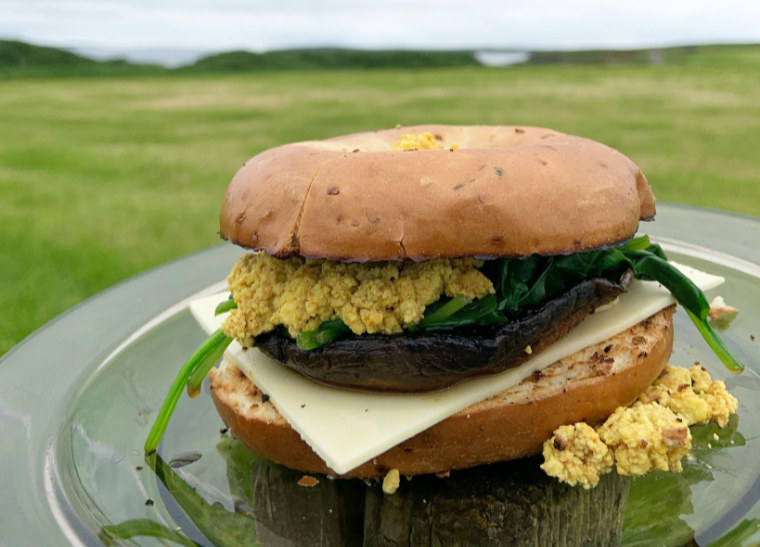
Serves 4 (or 2 if you’re hungry!)
Ingredients
- 4 red onion and chive bagels, sliced
- 4 Portobello mushrooms, wiped and stalk removed
- 2 Tsp chilli oil
- 2 Tbsp balsamic vinegar
- 4 cloves of garlic, peeled and crushed
- Half a pack approx. of fresh spinach
- Tofoo scramble
- 4 slices of Cathedral City cheddar
- Sriracha mayo or sauce
Method
- Dry fry the bagels, cut side down. Weight them down with a heavy object like an enamel plate or mug for faster ‘toasting’.
- Rinse the spinach in a colander with boiling water, set aside until cool.
- Add 1 teaspoon of the oil to a frying pan then add the mushrooms – you may need to do these one at a time.
- Drizzle a little of the balsamic over each mushroom and as each one is nearly ready, add some of the garlic to each. Set aside.
- Add the Tofoo scramble to the pan with the remaining oil and heat through.
- Once cool, ring any excess moisture out of the spinach with your hands.
- If you have another pan, add the mushrooms and spinach to warm through.
- Add the sriracha to the Tofoo.
- Pile each bagel with a garlicky, syrupy mushroom, top with the spinach, cheese slices and scramble and you’re good to go!

Aussie Damper Bread
Recommended by: Libby Hakim – food blogger at Cooking with Nana Ling
- www.cookingwithnanaling.com
- @cookingwithnanaling
- @cookingwithnanaling
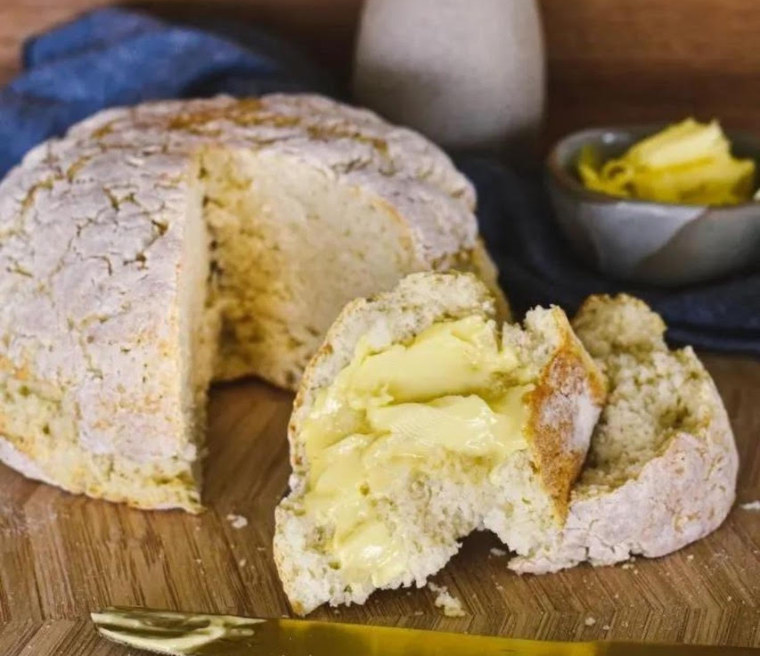
This damper bread recipe is super easy to make using basic ingredients. If you don’t have cooler space you can use water instead of milk. And it can be cooked directly in a campfire (wrapped in foil) if you don’t have a dutch oven. Plus, it’s very filling and unless you eat it in one sitting (which is easy to do!) you’ve got two days worth of camp lunch sorted. Pair it with your favourite sandwich filler or simply slather it in butter.
Aussie Damper Bread Recipe
This is a yeast-free bread that’s easy to cook on a campfire, and is based on a recipe used by Australian bushmen and early settlers in the 1800s.
Ingredients
- 3 cups plain/all purpose flour
- 1 1/2 tablespoons baking powder
- 1 tsp salt
- 1 1/4 cups milk (or sub water)
Method
- Sift flour and salt into a large bowl.
- Warm the milk and then add to the bowl. Mix with a butter knife until mixture sticks together. If there are still dry crumbly bits in the bottom of the bowl add another 1-2 tablespoons of warm milk until mixture holds together.
- Turn dough onto a floured surface and knead very gently into a round. When camping, simply attempt this step in the big bowl you’re using. Aim for 13-14cm round.
- Wrap damper in foil or place on a greased piece of foil in a dutch oven.
- Cover damper with hot coals and bake for about 25 minutes.
- Remove from oven and turn damper upside down on a wire rack to cool.
- Check the damper is cooked properly by tapping on the base. It should sound hollow. If not, return to the fire for another 5 minutes.
- Serve warm with butter or allow to cool.

Dutch Oven Vegan Vegetable Stew
Recommended by: Amna Muqeem – Editor-in-chief at Ravvy Reviews (food and kitchen blog)
- www.ravvyreviews.com
- @ravvyreviews
- @ravvyreviews
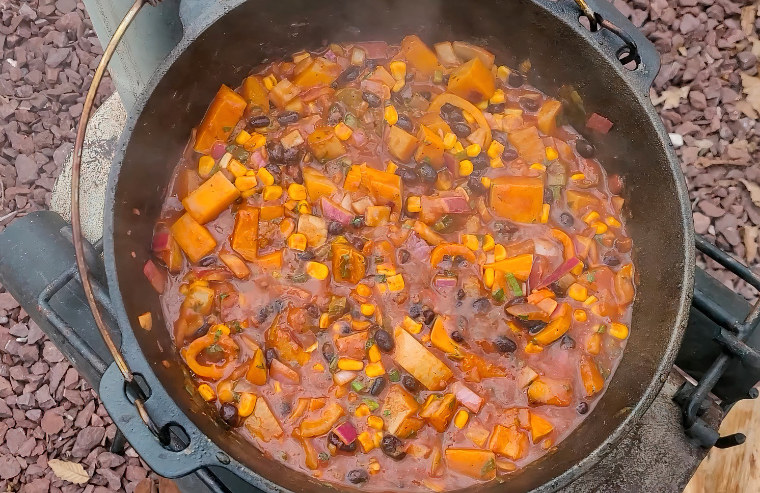
This vegan vegetable stew is perfect for camping as it doesn’t require much prep or any fancy ingredients! Just simple vegetables, a couple of spices, a Dutch oven, and you’re good to go. It’s also great to make if you’re camping with friends or family because everyone can help with the preparation.
Dutch Oven Vegan Vegetable Stew Recipe
This Dutch oven vegan vegetable stew comprises a variety of vegetables, thus adding to the nutrition of the recipe. It also includes different spices to further add a savoury touch. The use of Enchilada sauce (which is vegan, if you were unsure) gives this dish a Mexican touch too!
Ingredients
- 1 cup of black beans
- 1 large red onion
- ½ cup of corn
- 1 medium-sized butternut squash
- A fist full of cilantro
- 4 mini bell peppers
- 4 green onions
- Pinch of salt
- ¼ teaspoon black pepper powder
- ¼ teaspoon cumin powder
- ¼ teaspoon Tajin
- ¼ teaspoon paprika powder
- 2 tablespoons cooking oil
- ¾ cup crushed tomatoes
- ½ cup Enchilada sauce
Method
- Prepare the fire for your Dutch oven.
- Take your butternut squash and deseed it. Then, cut it into 1-inch bite-sized pieces.
- Add the cooking oil into the Dutch oven, then transfer the squash into it. Also add all the spices, i.e., salt, black pepper powder, paprika, Tajin, and cumin powder into it.
- Place the Dutch oven over a medium fire, and do not cover it. Leave it to cook for 10 minutes but stir the squash around every few minutes.
- In the meantime, chop the red onion, cilantro, and green onions. Cut the bell peppers into slices.
- Transfer the vegetables to the Dutch oven.
- Add the black beans, corn, crushed tomatoes, and Enchilada sauce.
- Stir and mix the vegetables into the liquids, then cover the Dutch oven and leave it to cook for 15 minutes.
- Keep an eye on the stew and stir every once in a while.
- Once done, dish the vegetable stew out and enjoy hot with bread or by itself.

Vietnamese Pancake or Stir Fry
Recommended by: Outdoorsman Dave – hiker, camper and content creator
- @outdoorsman_dave
- @outdoorsman.dave
- @OutdoorsmanDave”
- @outdoorsmandavenz
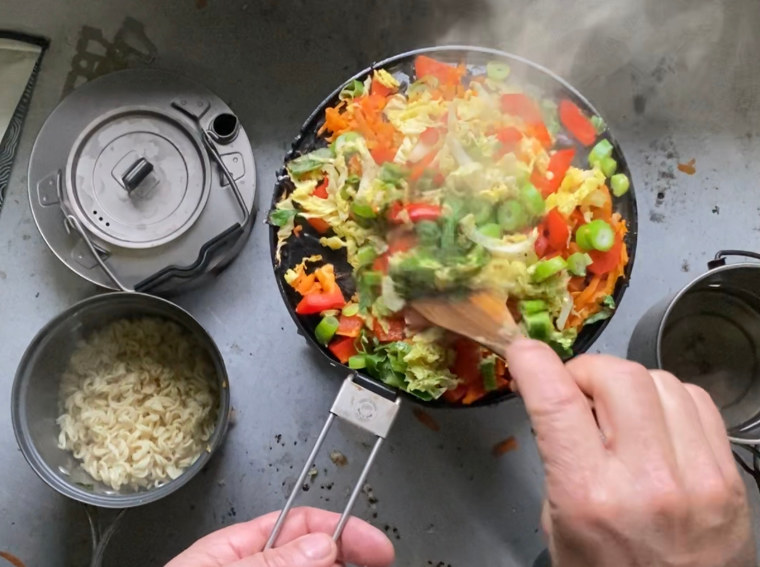
Two minute noodles are a stable and common tramper’s food source but to fancy them up, add a bunch of veg and sauces for a delicious camping lunch that’s as easy to cook on the trail as it is at camp.
Vietnamese Pancake or Stir Fry Recipe
A super simple, easy to make and affordable camping lunch recipe.
Serves 1
Ingredients
- 1 pkt wholegrain 2-minute noodles
- 1 Tbsp olive oil
- 1 carrot
- ½ red pepper
- 4 spring onions
- 150g Cabbage
- 150g Bean Sprouts
- 1 Tbsp fish or soy sauce
- 1 Tbsp Japanese type mayonnaise
- 2 eggs, lightly beaten
- Salt and pepper
Method
- Boil noodles and drain, mix in the flavour sachet.
- Heat oil in frying pan and add grated carrot, capsicum, spring onions and cabbage. Cook until soft.
- Either make an omelette in a separate pan and fold mixture inside or pour the lightly beaten eggs into the mixture as a stir-fry.
- Add salt and pepper to taste.
- Sprinkle bean sprouts on top and drizzle with soy sauce and mayonnaise.

Fresh Vegetable & Quinoa Soup
Recommended by: Mia Jones – camp cooking expert and food blogger
- www.moleinthewall.com
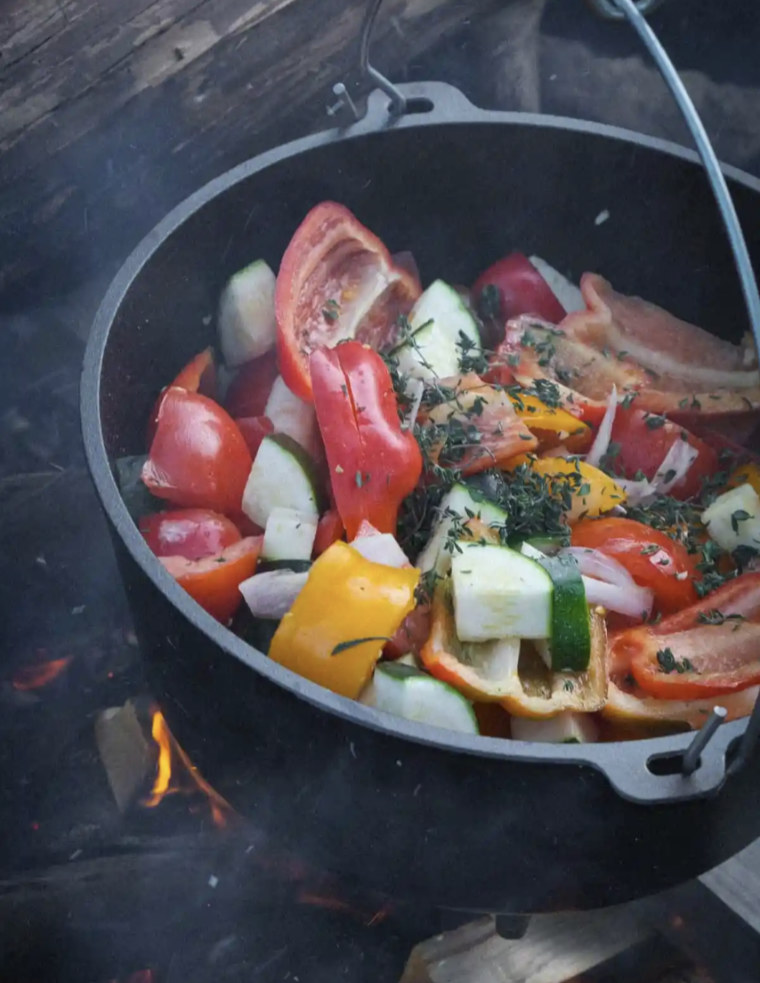
This campfire vegetable soup recipe is a delicious, healthy, and comforting choice that’s perfect for groups and a joy to prepare. Gather around the campfire, relax, and enjoy the communal cooking experience. With just one pot to clean, it’s incredibly easy to make and tidy up afterward. This simple yet delectable campfire meal is sure to be loved by everyone!
Fresh Vegetable & Quinoa Soup Recipe
The soup offers a delightful combination of complex and smooth flavors, diverse textures, and a vibrant herbaceous freshness. Plus, cooking it over an open wood fire adds a delicious smokiness, which knocks this soup out of the park.
Serves 10-12
Ingredients
- 6-8 large tomatoes
- 2 large zucchini
- 4 red bell pepper
- 3 shallots
- 1 head garlic
- 1 Tbsp fresh thyme
- 1 cup fresh basil (added on top as garnish)
- 1 lemon, juiced
- 1/4 cup olive oil, plus approximately two tablespoons more for sautéing onions & garlic
- 1 cup uncooked quinoa
- 3-4 cups water
- 2 Tbsp seasoned rice vinegar or balsamic vinegar/balsamic glaze
- 1Tbsp salt
- 1 tsp cracked black pepper
- Optional: add other veggies that you may have access to for example, yellow squash, chayote, pumpkin or green beans.
Method
- Prep the veggies by cutting them up into 1-2 inch pieces.
- Prepare your soup pot by placing it over your heating source on medium heat and pour 2-3 tbsp of olive oil and allow it to come up to temperature.
- Add the sliced shallots and garlic to the hot pot. Cook for five minutes then add all of the vegetables.
- Remove the fresh thyme leaves from the hard fibrous stems and drop them in the pot (about 1 Tbsp).
- Place the cover on top and allow the ingredients to sweat and start releasing moisture.
- Check and stir occasionally to make sure the liquids are releasing and that nothing is burning or stuck to the bottom.
- When the soup gets to a mild boil, add the vinegar or balsamic glaze.
- Monitor liquid levels as vegetables cook and hydration evaporates. Add 2-3 cups of water.
- Add 1 cup of uncooked quinoa and 2 additional cups of water.
- When the vegetables are cooked through, remove the soup from the heating source.
- Add the olive oil, lemon juice and fresh basil on top. Season with salt and cracked black pepper.
- Optional: Add a splash of maple syrup for an added layer of sweetness. You may also like to add some crushed red pepper flakes to bring some heat.
The post Camping Lunch Ideas: 12 Easy Camp Recipes appeared first on Cool of the Wild.


