The Model 1911 pistol chambered in 45ACP is one of the most beloved and followed after handguns in history. Springfield Armory has made high-quality 1911s of their own for years and within the last few years, they introduced their Defender Series line up of quality crafted affordable handguns. Included in the line up is the Mil-Spec Defender 1911 which I had recently done a review on and was very impressed with. You can check out that review here over at our sister-website on TheFirearmBlog (TFB).
While this firearm is in my possession for review I had been thinking of useful and entertaining articles to put out on the internet. I was shocked to find that AllOutdoor had not yet done a field strip of a basic 1911. I am super happy to do it even if its a fairly easy process. I hope that it will be helpful to someone somewhere! I should mention there are some 1911 exceptions that will vary from this field stripping. Typically they will stray from the usual if they have a bull barrel and no barrel bushing or a recoil spring guide that must be rotated or unscrewed.
AllOutdoor Field Strip: Springfield Armory 1911 Mil-Spec
- First thing is first! Practice all the rules of gun safety. When disassembling a firearm you should always wear safety glasses due to multiple parts being under spring tension. Triple check that the 1911 is unloaded. Check the chamber, magazine, and the area in between. All set? Let us jump right into it!
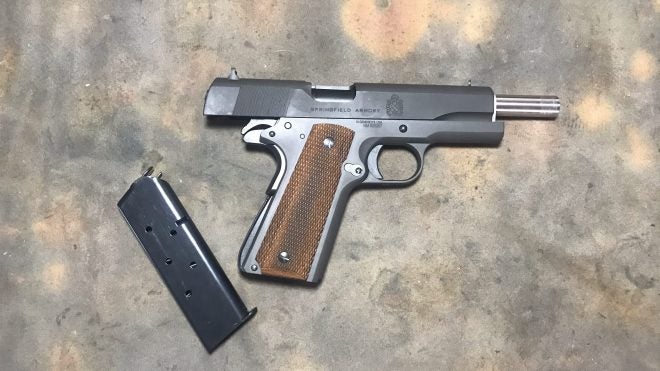
- Lock the slide to the rear and remove the magazine. Now that you have verified an empty gun you can release the slide. Some prefer the hammer to be cocked so as to not exert any pressure on the slide or get in the way. This is entirely preferential and the hammer will most likely be cocked regardless.
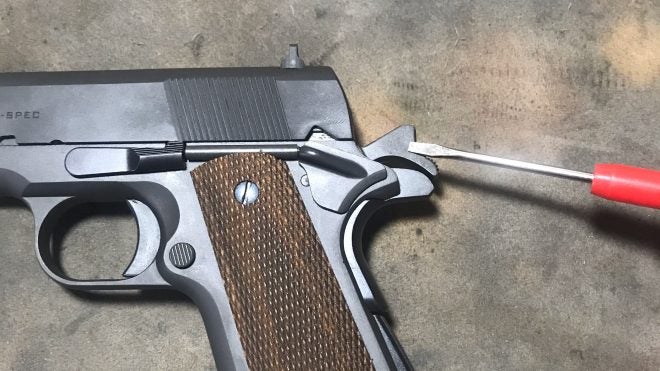
- Next, move to the muzzle and note the barrel bushing (silver-colored part in this instance) and the textured and knurled recoil spring plug that is being retained by the bushing. The next step is where safety glasses and patience will come in handy.
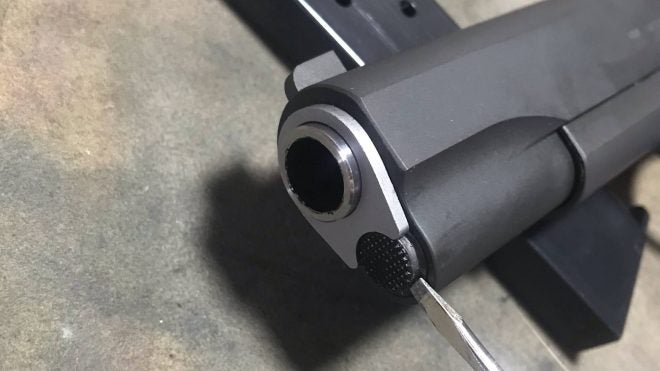
- There are some tools that help and ease this process but it is not impossible with your fingers. Firmly depress the recoil spring plug and rotate the barrel bushing to the left so it covers the plug. At this point, you can continue rotating until the bushing is completely out of the way and the plug is no longer retained by anything other than the pressure you are continuing to apply.
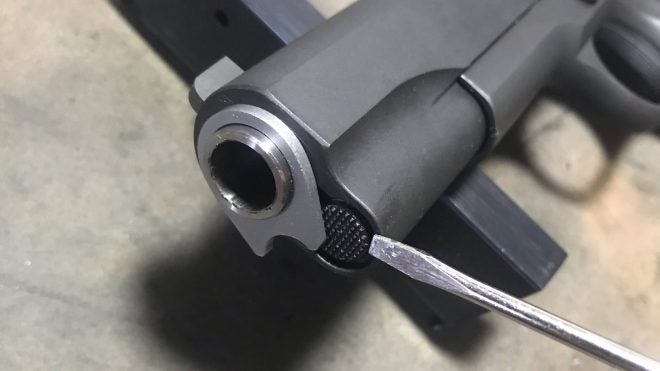
- Now very carefully release pressure applied and the plug will come out to the front of the muzzle followed by the recoil spring shown in the picture below. Note that the plug can be removed and the spring can as well but the spring may be stuck and can be worked out later.
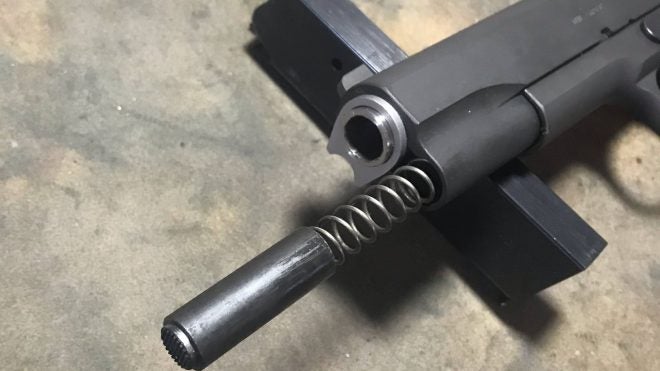
- To remove the barrel bushing, rotate it in the opposite direction and pull it out. There is a cut in which the bushing has to find in order to be pulled out. If you have trouble continue rotating and pulling until it comes out the front.
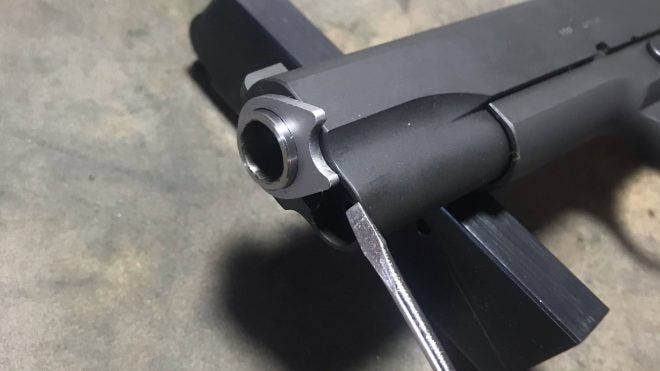
- Now that the business at the front of the handgun is over we can gently bring the slide to the rear just enough where the slide release lines up with the cut shown in the picture below. When lined up you are able to push the pin attached to the slide release on the opposite side of the gun. The slide release should lift out very easily.
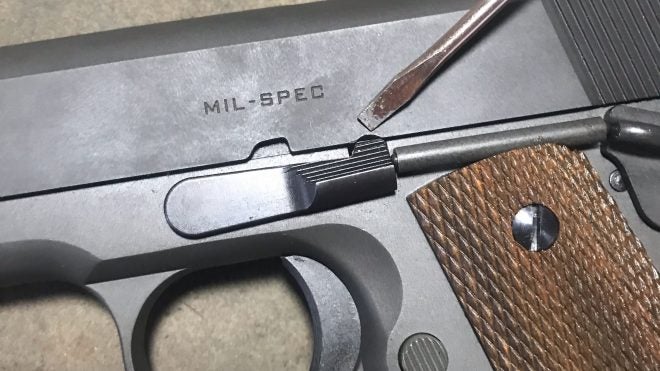
- Now that the slide release is removed you can move the slide off the front of the gun. Note that the slide can get snagged due to the free recoil spring guide inside. The recoil spring guide may fall free as soon as the slide comes off of the receiver.
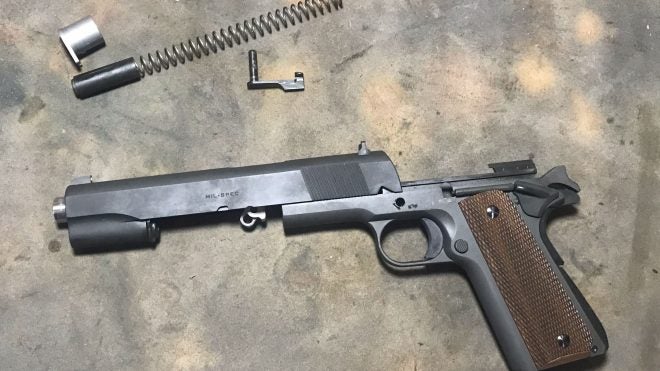
- As you can see the recoil spring guide in the picture below has fallen free now that the slide is off the receiver. Pictured is the correct orientation for later installation. The horns of the guide should face the barrel and hug it.
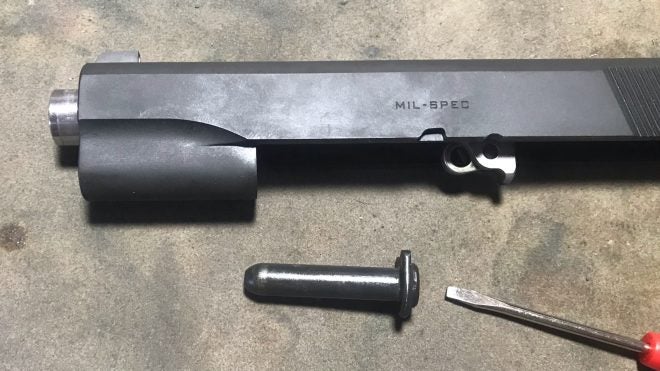
- Shown in the picture below is the barrel still in the slide for the sake of mentioning the barrel link is where the slide release pin goes during proper reassembly. The barrel link should be placed facing forward and the barrel may now be pulled out the front of the slide.
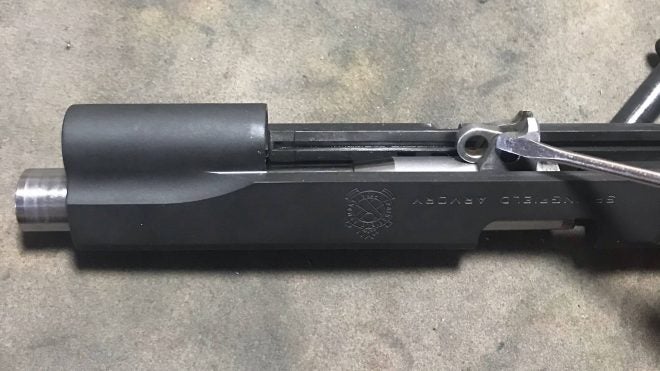
- Now the firearm is completely field stripped. Ensure all your parts are accounted for and clean and ready to be put back together. Reassembly is quite simple if you follow the steps in reverse.
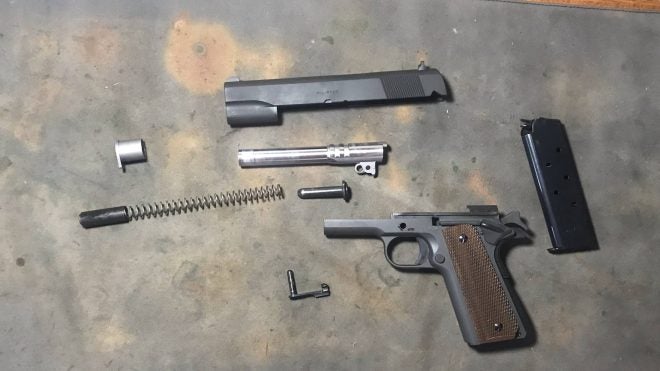
Big thank you to anyone who tuned in and followed along! I hope this was helpful and educational. Please always remember to practice proper gun safety and to be mindful of parts so that you do not lose any. Safe and happy field stripping!
The post AllOutdoor Field Strip: Springfield Armory 1911 Mil-Spec appeared first on AllOutdoor.com.


