Having a paracord watch band is a simple item that may become handy during survival situations. Instead of buying why don’t you make your own with this easy tutorial.
A paracord watch band is a wristband crafted from a durable and lightweight parachute cord, commonly known as a paracord. This cord was initially used in parachute suspension lines during World War II, hence its name.
Today, paracord has found its way into various survival tools and accessories due to its exceptional strength and flexibility.
RELATED: Top 10 Reasons To Never Leave Home Without A Paracord Bracelet
Fast & Easy Paracord Watch Band Tutorial
What You’ll Need:
- 1 Watch face
- 8-12 feet of paracord
- Standard side release buckle
- Torch lighter
- Sharp scissors
- Measuring tape (optional)
- Bracelet Jig (optional)
Note: It’ll be better if you use an outdoor watch face so it’s more durable.
Step 1: Get the Correct Measurement
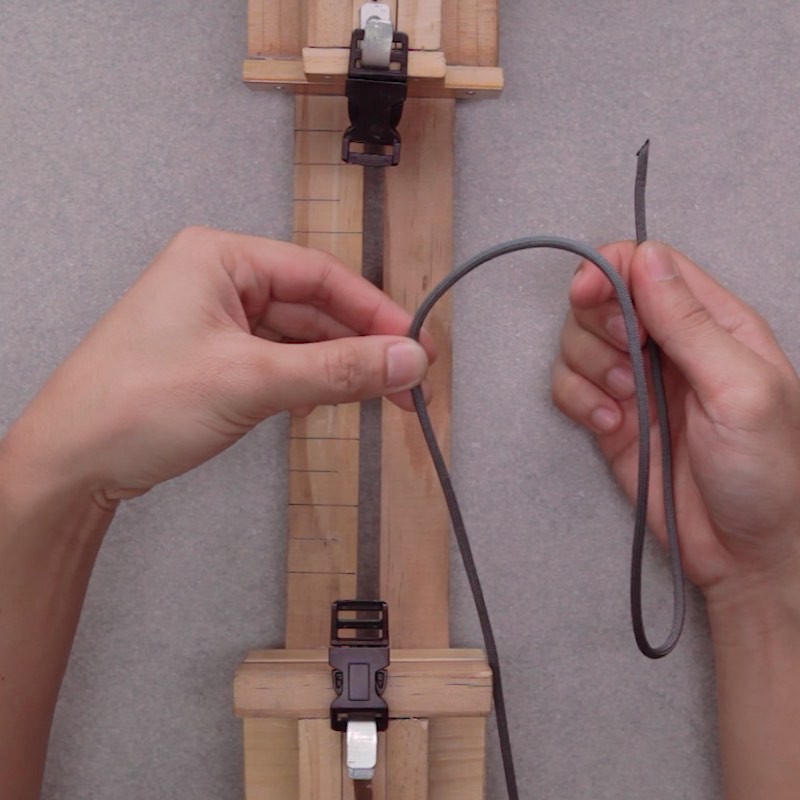
Before starting with your loops and knots make sure to measure the length of the watchband around your wrist. Having a measuring tape would help but you can just use your 550 paracord to do this.
Get one end of your paracord and connect it to the other end then wrap it around your wrist. Measure the length and take note of the measurement. It’s better to leave a 1/2 to 1-inch allowance to make room for error.
Burn the edges using your torch lighter to ensure that the paracord is locked on both sides.
Step 2: Loop & Knot Your Paracord
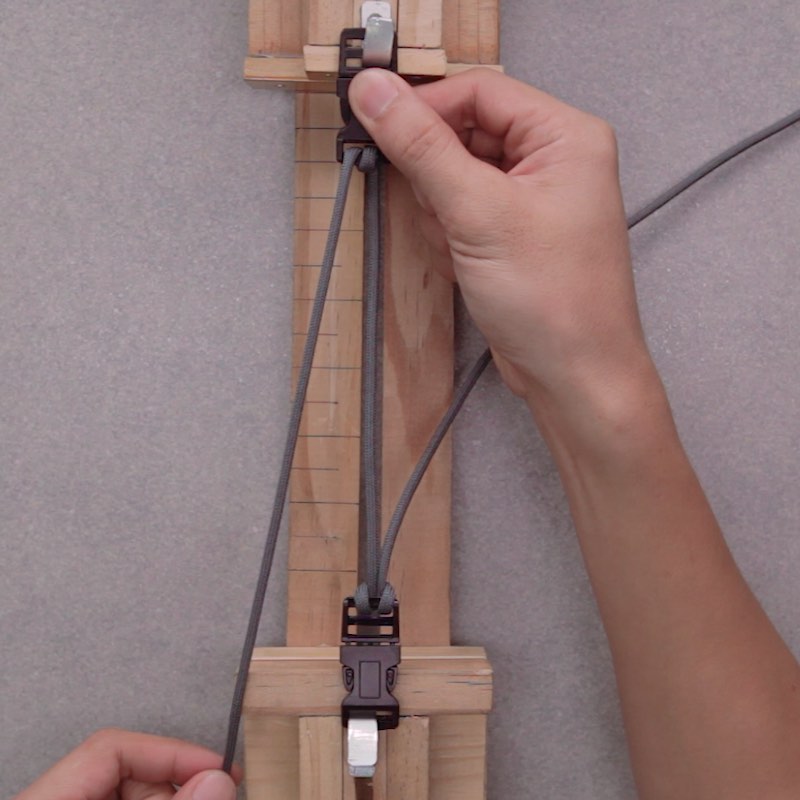
Now, it’s time to loop and knot your paracord watch band. But first, attach your buckles to your bracelet jig (if you have one).
Then, find the center of your paracord and fold it in half. Create a cow hitch by running down the folded paracord through the end of the buckle. Slide the two paracord strands from the loop you created. Make sure to pull the two strands tight to create your first knot.
Slide one of the paracord strings from the folded paracord to the other buckle. Then, repeat this step for the other string.
By this time, you should have four strands in your buckle.
Step 3: Do the First Part of the Trilobite Weave
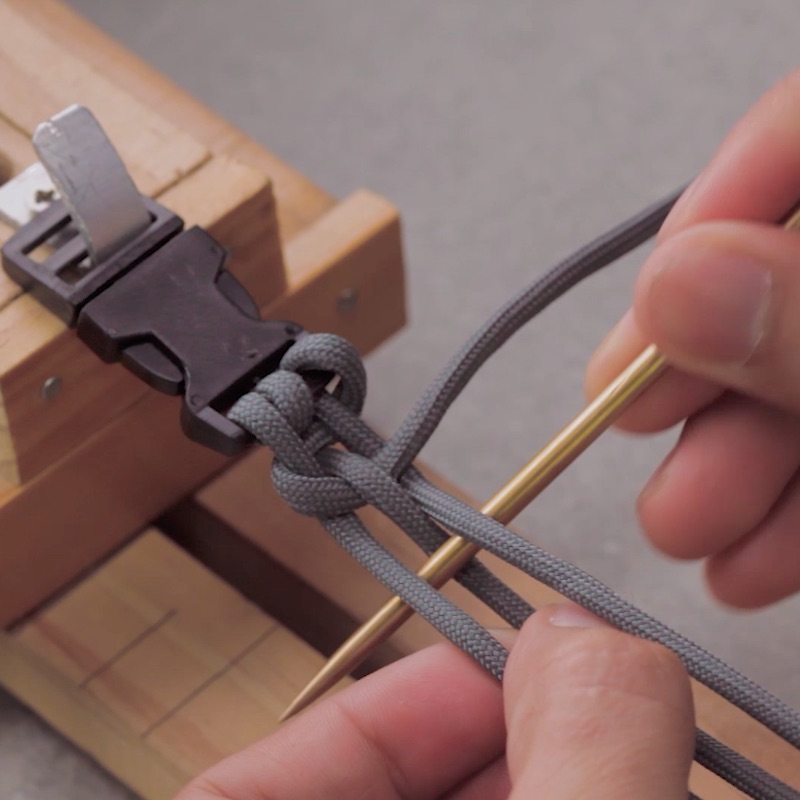
From the four strands you created, start working on your trilobite weave.
Starting with the right-hand side, go over the first cord then under the third cord. Next, go over the last cord and then under the third cord, and over the first cord again. Just repeat these steps until you reach the middle part of your watchband.
Step 4: Attach Your Watch Face
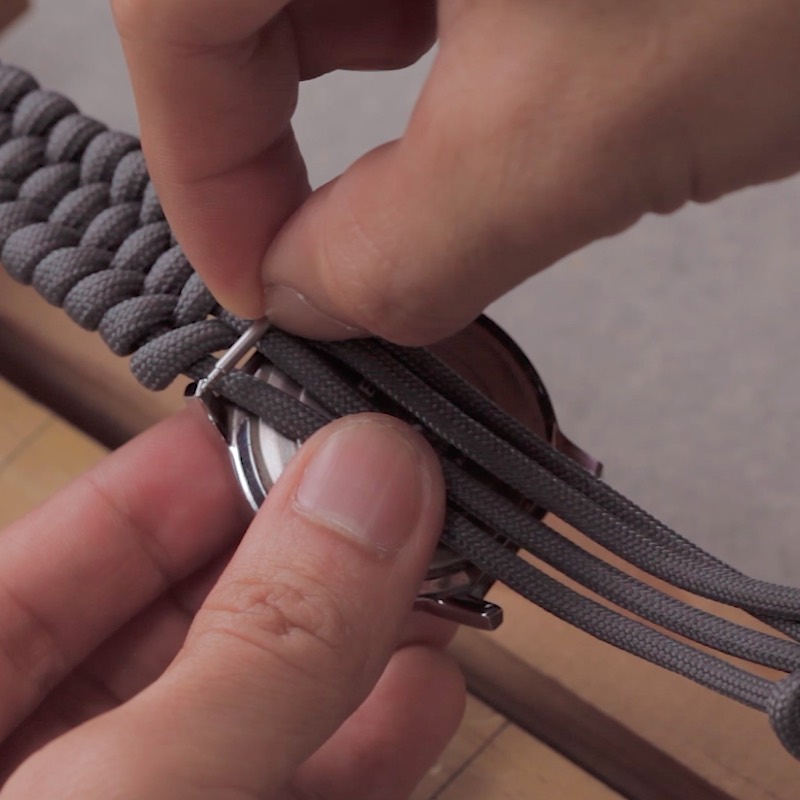
Make sure that you’ve reached the middle part to make your band even.
Unhook the watch pins from your watch face. Now attach it to your paracord watch band and lock it in place by attaching the pins back to their place.
Step 5: Continue With the Last Part of the Trilobite Weave
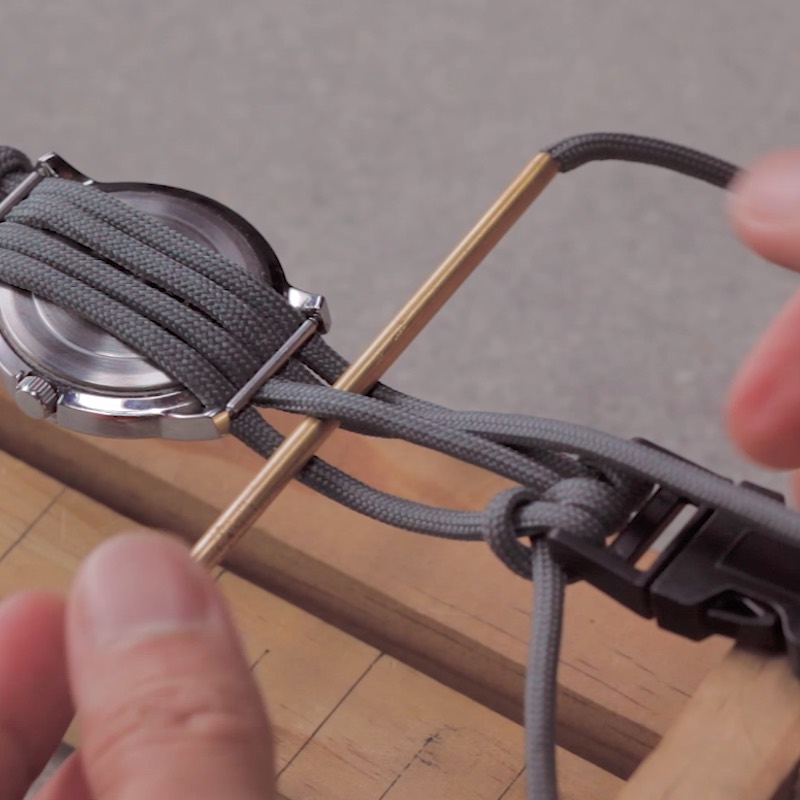
Continue where you left off until you reach the other end of the buckle.
Final Step: Cut and Secure
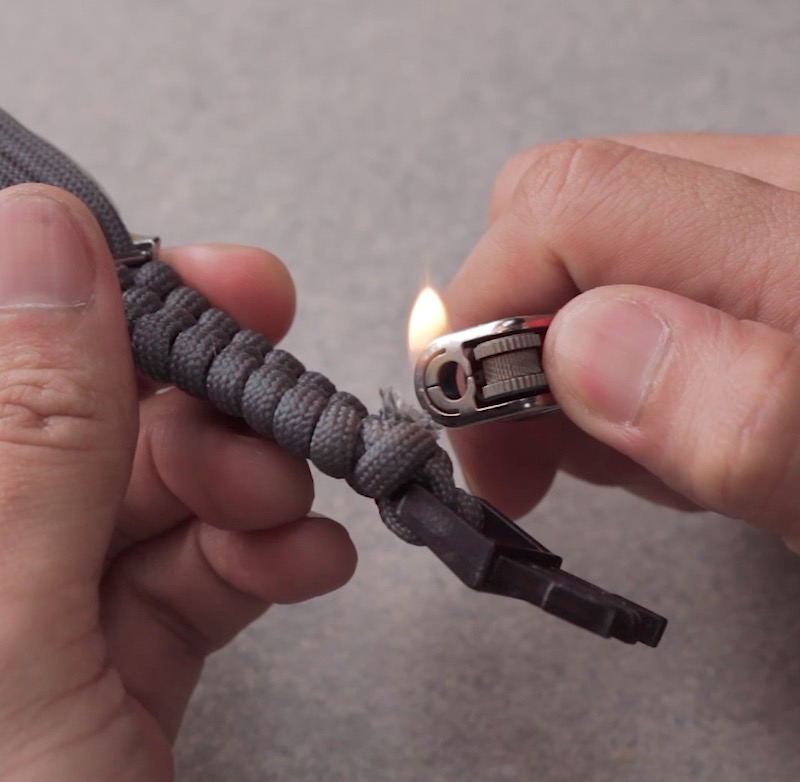
Once you reach the end of the buckle, create a secure knot then cut the excess paracord with your sharp scissors.
Using your lighter, melt the ends and press them tightly to make sure they attach to the rest of the cords.
Make sure to watch our video for reference:
Now isn’t that tutorial fast and simple? This paracord watch band is also a great project with your kids!
Paracord Watch Bands for Survival Situations
In survival situations, having a paracord watch band can be a game-changer. The paracord used in these bands can typically hold up to 550 pounds, making it a reliable and robust resource in emergency scenarios. The watch band itself serves as a wearable storage of cordage, providing you with several feet of strong rope that can be easily unraveled when needed.
Here are some ways in which paracord watch bands are useful in survival situations:
Shelter Building: A primary concern in survival situations is finding shelter. The paracord in the watch band can be used to construct a makeshift shelter by tying branches or other materials together securely. This offers protection from the elements and can significantly improve your chances of survival.
Gear Repair: When you’re out in the wilderness, gear can break or malfunction. The paracord can be used to mend torn backpack straps, broken shoelaces, or damaged equipment, ensuring that you can continue your journey without setbacks.
Securing Gear: The strength of the paracord makes it ideal for securing gear to your backpack or hanging food supplies out of reach from animals. Keeping your gear elevated and secure can prevent damage and loss.
Crafting Tools: In a survival situation, you might need to craft tools or weapons to help you survive. The paracord can be unraveled and used to make snares, fishing lines, or even a bow and arrow, aiding you in catching food.
First Aid: The paracord can serve as a tourniquet or a makeshift sling to immobilize an injured limb. Having access to a strong and reliable cordage can be crucial in providing first aid to yourself or others.
Emergency Repairs: Whether it’s fixing a broken tent pole or a torn backpack strap, the paracord can be used for quick and temporary emergency repairs until you can find a more permanent solution.
Signal Communication: If you find yourself in need of rescue, the bright colors of the paracord can be used to signal for help. You can create a visible flag or hang it in a noticeable location to attract attention.
Lashing and Binding: The paracord’s strength and flexibility make it ideal for lashing and binding materials together. This can come in handy when building a raft, constructing a shelter, or creating other survival structures.
What other paracord projects do you want to learn from us? We’d love to hear your suggestions in the comments section below!
Up Next:
- 36 Awesome Paracord Projects For Preppers
- Homemade Paracord Knife Grip | DIY Paracord Projects
- How To Use A Picture Frame For Hidden Gun Storage
Calling all preppers, craftsmen, bushmasters, outdoorsmen, and all-around skilled people, Survival Life needs YOU! Click here if you want to write for us.
Don’t forget to stay connected with us on Facebook, Twitter, Pinterest, and Instagram!


